Maintaining impeccable cleanliness in a food workshop isn’t just about appearances; it’s a fundamental requirement for food safety, quality, regulatory compliance, and brand reputation. Effective cleaning prevents contamination, pest infestations, and ensures a safe working environment. This guide outlines critical steps for each phase of the cleaning process.
I. Before Cleaning: Preparation is Paramount
Cease Production: Ensure all production, processing, and packaging activities have completely stopped. Lock out equipment if necessary for safety.
Clear the Area:
Remove all raw materials, ingredients, packaging, and finished products from the cleaning zone.
Relocate movable equipment, utensils, and small tools to designated cleaning areas (e.g., wash bays).
Cover or protect any sensitive equipment or materials that cannot be moved.
Pre-Clean (Dry Cleaning):
Sweep floors thoroughly to remove large debris, crumbs, and dry spills.
Scrape excess food residues from surfaces, equipment parts, and utensils.
Empty bins and remove all waste from the workshop area to the external waste disposal point.
Disassemble Equipment:
Break down machinery and equipment according to the manufacturer’s instructions (e.g., remove guards, belts, blades, hoppers, trays, nozzles).
Separate food contact surfaces from non-contact parts.
Prepare Cleaning Solutions:
Follow the manufacturer’s dilution instructions precisely for detergents, disinfectants/sanitizers.
Use water at the correct temperature (usually warm water, as specified).
Label chemical containers clearly. Never mix chemicals!
Refer to Safety Data Sheets (SDS) for handling precautions.
Gather Supplies & Tools:
Ensure all necessary items are ready: Appropriate brushes, scourers (non-abrasive for sensitive surfaces), cloths (color-coded ideally), mops, buckets, spray bottles, squeegees, PPE.
Check equipment for wear or damage; replace if necessary.
Personal Protective Equipment (PPE):
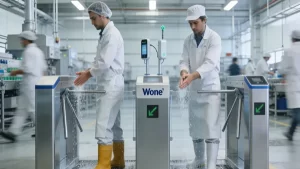
Mandatory: Wear clean, appropriate PPE: Rubber boots, waterproof aprons, heavy-duty gloves, safety goggles/face shields (especially when handling chemicals or high-pressure water), and hairnets/beard snoods.
Remove jewelry and watches.
II. During Cleaning: Methodical Execution
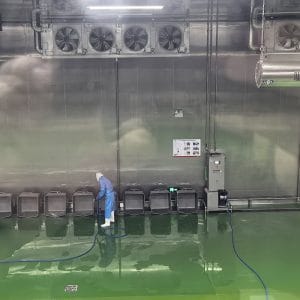
Follow the Sequence: Clean from top to bottom (ceilings, lights, walls, equipment, floors) and from cleanest to dirtiest areas to prevent recontamination.
Wet Cleaning & Detergency:
Apply the correct detergent solution generously to surfaces. Allow adequate contact time to loosen grease and soil.
Scrub thoroughly using appropriate tools. Pay special attention to corners, crevices, seams, hinges, undersides of equipment, and drains where residues accumulate.
Focus intensely on all food contact surfaces (cutting boards, blades, conveyors, mixers, utensils, containers).
Rinse Thoroughly:
Use clean, potable water (pressurized if safe and appropriate) to rinse away all detergent and loosened soil completely. Residue left behind can inactivate sanitizers or contaminate food.
Cleaning Disinfection/Sanitization:
Apply the approved disinfectant/sanitizer solution at the correct concentration to all cleaned surfaces, especially food contact surfaces.
Crucial: Allow the disinfectant to remain wet on the surface for the full recommended contact time (dwell time) specified on the label. This is essential for microbial kill.
Do not rinse after disinfection unless the sanitizer label specifically requires it (most food-safe, no-rinse sanitizers are used).
Cleaning Tools:
Clean and rinse brushes, cloths, and mops frequently during the process to avoid spreading dirt.
Use color-coded tools for different areas (e.g., red for floors, blue for food contact surfaces, green for non-food contact surfaces) if possible.
Drains & Floors:
Remove drain covers, clean grates and traps thoroughly, flush drains with detergent and hot water, then sanitize.
Mop floors systematically, changing rinse water frequently. Use a “two-bucket” system (one for detergent, one for rinse) for effective mopping.
III. After Cleaning: Verification & Reset
Rinse (if required): Only rinse surfaces if the specific disinfectant used mandates it.
Air Dry: Allow all surfaces, equipment, and utensils to air dry completely. Moisture promotes bacterial growth. Use squeegees on floors to remove standing water.
Reassemble Equipment: Carefully reassemble all equipment according to manufacturer guidelines. Ensure all parts are dry and correctly fitted. Lubricate only with food-grade lubricants where necessary.
Inspect & Verify:
Conduct a meticulous visual inspection of all cleaned areas and equipment under good lighting. Look for any remaining soil, moisture, detergent residue, or damage.
Use ATP swab testing periodically or as required to verify cleaning effectiveness on critical surfaces (check for acceptable bioluminescence levels).
Check chemical concentrations (using test strips) if applicable.
Store Supplies & PPE:
Clean, disinfect, and thoroughly dry all cleaning tools (brushes, mops, buckets, cloths). Hang mops and cloths to dry completely.
Store cleaning chemicals securely in their designated, labeled area, away from food and food contact surfaces.
Properly dispose of single-use items (e.g., paper towels) and used cloths if not reusable.
Clean and store PPE appropriately.
Documentation:
Record the cleaning activity: Date, time, areas/equipment cleaned, personnel involved, chemicals used (with batch numbers if required), concentrations, contact times, and verification results (visual, ATP).
Note any issues encountered (e.g., damaged equipment, persistent soil) and corrective actions taken.
Sign off on the cleaning record.
Restock & Reset:
Only after everything is dry and verified as clean, return protected materials and pre-cleaned, movable equipment to their positions.
Restock handwashing stations with soap and paper towels.
Replace bin liners in empty bins.
Key Considerations for All Phases:
Chemicals: Use only food-safe, approved detergents and disinfectants. Never use bleach near acidic foods or cleaners. Store chemicals securely.
Water Quality: Use potable water for all cleaning and rinsing steps.
Training: Ensure all cleaning staff are thoroughly trained on procedures, chemical handling, PPE, and food safety principles.
Frequency: Follow the established cleaning schedule (daily, weekly, monthly deep cleans) based on risk assessment.
Allergen Control: Implement rigorous cleaning protocols where allergens are handled to prevent cross-contact. Dedicated equipment or intensive cleaning with verification is often required.
Pest Control: Cleaning eliminates food sources for pests. Report any signs of pest activity immediately.
Conclusion:
Consistent and meticulous cleaning, following a structured before-during-after approach, is the bedrock of a safe and successful food workshop. By prioritizing preparation, methodical execution, and thorough verification, you significantly reduce the risk of contamination, ensure compliance, protect consumers, and maintain a professional and efficient production environment. Never underestimate the importance of a clean start.
Disclaimer: This guide provides general principles. Always adhere to your facility’s specific Standard Operating Procedures (SOPs), HACCP plan, and local food safety regulations (e.g., FDA Food Code, EU regulations, local health codes).